The code for this post can be found here: https://github.com/wsdCollins/Chatwork-OAuth
This is a sample repo for connecting to and using OAuth with Chatwork. This
repository will cover the scope of creating a new application, getting approval
or denial from a user. And concluding with getting a token on behalf of the
user. This repository is not intended to cover the finer points of connecting
to OAuth, only to serve as a practical coding guide for connecting to
Chatwork as an OAuth provider.
Step 01 – Creating a Domain Name
To start we will need a domain with https to host our application on. In this case we will
use cw.blog.wsd.sh*. First we will add a DNS entry for the subdomain.

Then we need to create an Nginx configuration to serve the site.
# vim /etc/nginx/conf.d/cw.blog.wsd.sh.conf
--- Paste the Following content ---
server {

    listen 80;
    listen [::]:80;

    index index.html;
    server_name cw.blog.wsd.sh;

    proxy_set_header Host $host;
    proxy_set_header X-Forwarded-Proto $scheme; #http pr https
    proxy_set_header X-Real-IP $remote_addr; #client IP address
    proxy_set_header X-Forwarded-For $proxy_add_x_forwarded_for;

    location ^~ /.well-known/acme-challenge/ {
        root /var/www/html;
        default_type "text/plain";
    }

    location / {
        #try_files $uri $uri/ =404;
        proxy_pass http://localhost:4000;
    }

}
--- Write and Quit ---
And then we restart nginx to implement the changes before calling certbot
to get a certificate from Let’s Encrypt.
Once this is complete, you should have a valid https connection that returns
a 502 error page because we have not set up a server to reverse proxy to.
We will do that in Step 03.
Step 02 – Create an OAuth Client
Login into Chatwork, and click on the top right hand menu. Then click on “Integrations”.

From the on the right hand menu click on OAuth, and then in the OAuth page, click on the
button that says “Create New”.

Note that in the link provided for the OAuth Docmentation is an English PDF with some incomplete
information, I recoment using the Japanese documentation which can be found here: https://developer.chatwork.com/ja/.

From there we will enter the details for our OAuth client applicaiton. We will set the “Client Name” as “WSD Hello World”, we will include a logo for the Icon, for the “Client Type” we will select ” Confidential”, and for the “Redirect URI” we will specify “https://cw.blog.wsd.sh/oauth/chatwork“.
After that we need to select the checkboxes for which permissions we will use from the application. In our case, we’re only interested in reading or writing files. So We’ll selected the scopes for basic account information, ability to read rooms, ability to read files from rooms, and ability to write files to rooms. If needed, the scopes and callbacks can be edited later. Once we’re done, we click “Create” at the bottom.

Once that is complete, we should see this screen.

Make a note of the Client ID and Client Secret at the bottom. These will be needed in the next step to authenticate our server to get tokens.
Step 03 – Create Application
First we clone this repository
Then we need to add our client id and client seecret to the dotenv file. Replace the values
with your client id and client secret from the last step (without the square brackets).
From there we can run the server.
# node index.js
If we open up the browser to https://cw.blog.wsd.sh/, we should see a mockup integrations page.
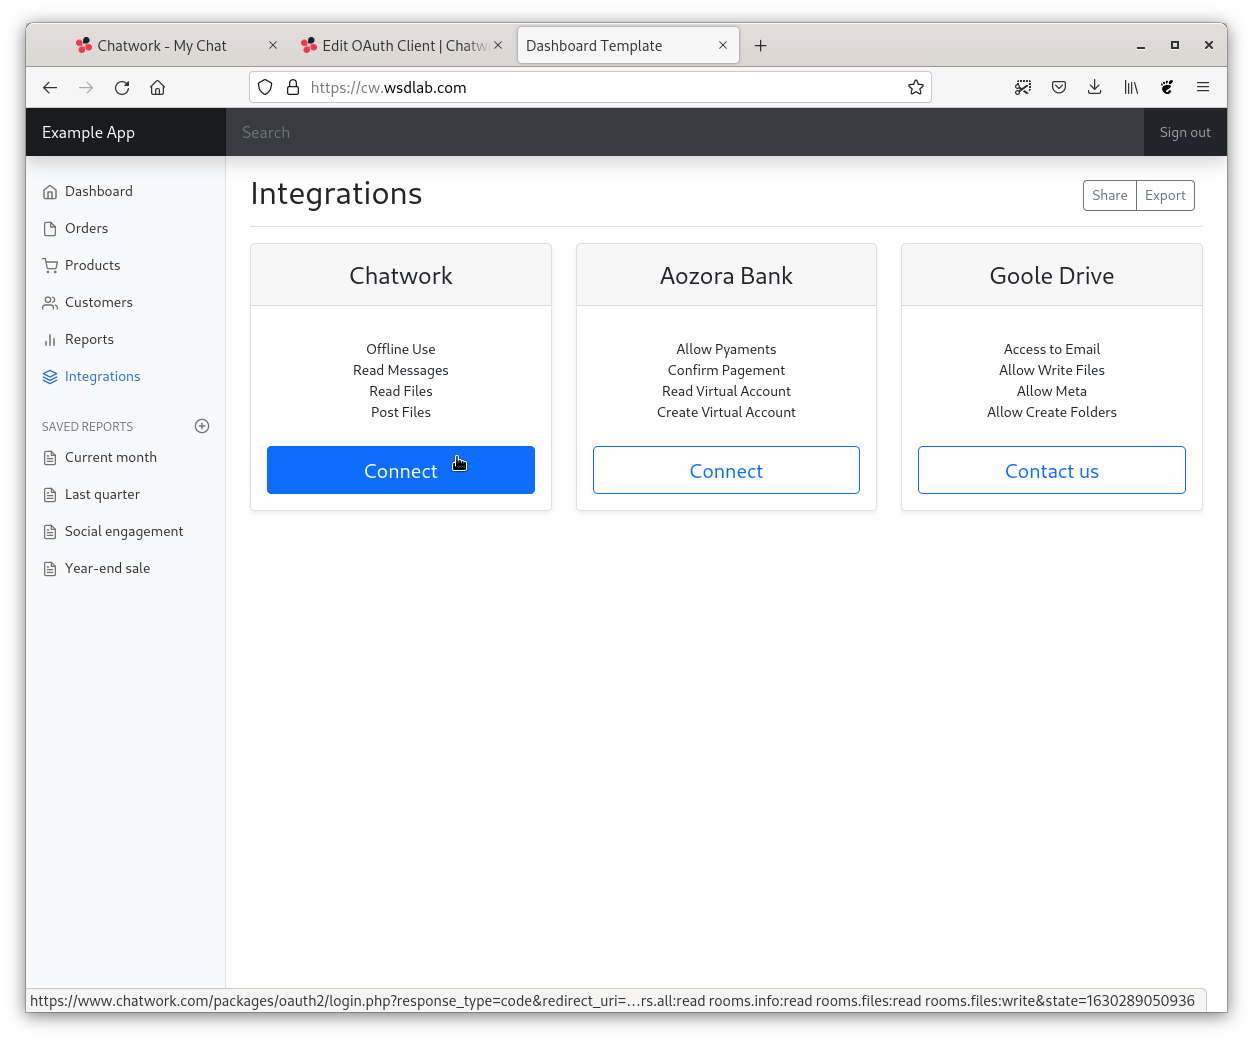
If we click on the “Connect” under the “Chatwork” integration, it should take us to the OAuth approval page.
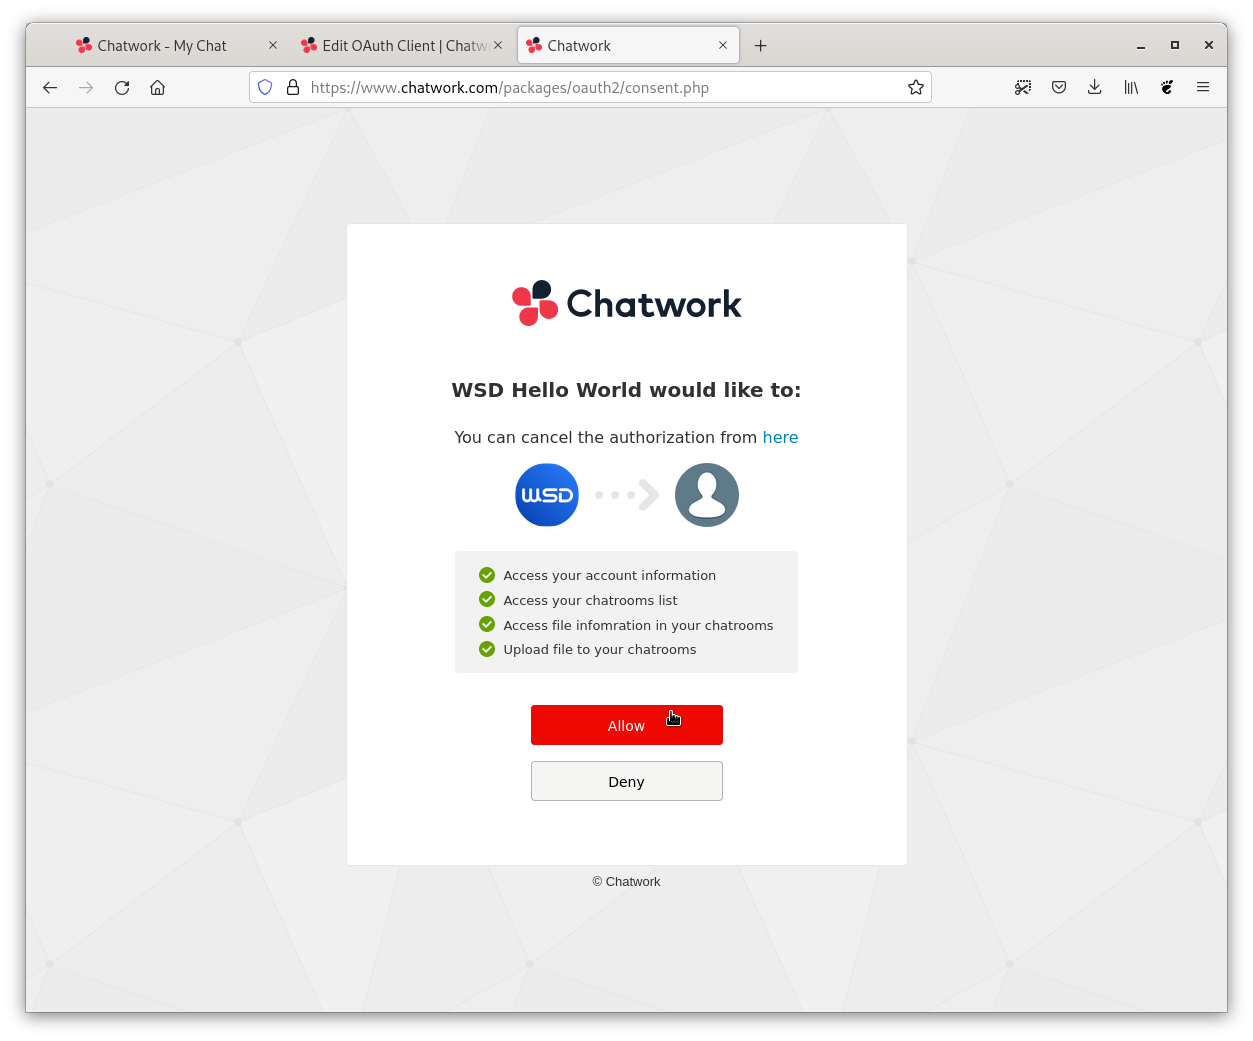
If we click “Approve”, it should take up to the callback page, where we get a token to use the application.

And we get a token that will expire in a few minutes.
Explanation
Two points to draw attention to are how we get to the OAuth accept screen, and what
to do after the user has chosen an action.
(function () {

    'use strict'

    const state = Date.now();
    const url = [
        'https://www.chatwork.com/packages/oauth2/login.php',
        '?response_type=code',
        '&redirect_uri=https://cw.blog.wsd.sh/oauth/chatwork',
        '&client_id=0D43MyaOxMyO6',
        '&scope=users.all:read rooms.info:read rooms.files:read rooms.files:write',
        `&state=${state}`
    ].join('');

    const cw_oauth = document.getElementById('cw_oauth');
    cw_oauth.setAttribute('href', url);

    feather.replace({ 'aria-hidden': 'true' })

})();
In public/js/oauth.js is where we create the link to the Chatwork confirmation
page. The link to the page is https://www.chatwork.com/packages/oauth2/login.php
and we provide several GET query parameters to pass to the page.
The response_type is code, meaning that Chatwork creates a code, and we return it
back to them to confirm that we received it. The redirect_uri is where we want our
application to handle the response from the confirmation screen. The client_id lets
Chatwork know specifically which application to get approval for. The state is a
session id, or some other one time value to differentiate which user and which
session the confirmation attempt is being made for. And scope tells the confirmation
screen which permissions we want the user to allow us to use.
const express = require('express')
const fetch = require('node-fetch')
const dotenv = require('dotenv')

dotenv.config();

const app = express()
const port = 4000
app.use(express.static('public'))

app.get('/oauth/chatwork', async function(req, res) {

    // Create the Authentication body

    const body = [
        'grant_type=authorization_code',
        `code=${req.query.code}`,
        'redirect_uri=https://cw.blog.wsd.sh/oauth/chatwork'
    ].join('&');

    // Create Authentication Header

    const basic =  `${process.env.CLIENT_ID}:${process.env.CLIENT_SECRET}`;
    const base64 = Buffer.from( basic ).toString( 'base64' );

    const url = 'https://oauth.chatwork.com/token';
    const params = {
        method : 'POST',
        headers : {
            'Authorization' : `Basic ${base64}`,
            'Content-Type': 'application/x-www-form-urlencoded'
        },
        body : body
    }

    // Send Authentication Response

    const ajax = await fetch( url, params );
    const json = await ajax.json();
    res.json( json );

});

app.listen(port, () => {
    console.log(`Example app listening at port: ${port}`)
});
Once the client either clicks “Allow” or “Deny” on the confirmation screen they
are redirected to the url we specified in GTE query parameters for the
confirmation screen. In this case since we’re using Express, I used a path
without an extension and doesn’t represent a folder to designate that callback
is being executed as a server-side process as opposed to a page that is displayed
to the user.
Admittedly this callback doesn’t handle the possibility of getting a “Deny” reply.
In reality, we should be checking the response and replying accordingly. In this case
we wanted to focus on how we accept the token on the condition the user clicks
on “Allow”. And we see that in the body which provides three values.
The two values that are passed to us as GET query parameters, is the state value we provided
and a code value. The first value we reply with is grant_type, which has a fixed value of
“authorization_code”. For the code we supply the GET query parameter that was sent to us.
And last is the redirect_uri, which shouldn’t be needed as is not required as we’re already
done with that part, but I found if I didn’t supply it, I got errors that the value didn’t
match or something.
From there we need to supply our secret to confirm to Chatwork OAuth, that it really is
us, and not somebody else using our client ID. The way we do this is a twist on
“Basic Authentication”, which really just means authenticating with “username:password”.
For the username we supply the Client Id from our OAuth settings page, followed by a colon
and the password is the Client Secret from our OAuth settings page.
We then take the string of “[Client_Id]:[Client_Secret]” and encode that as a base64
string. We then need to supply that as a header. The header value is “Authorization”, and
the value is the string “Basic” followed by a space and the base64 string of our
client id and client secret. The content type is application/x-www-form-urlencoded,
and the body is our form-urlencoded list of arguments made in the body.
We send this to Chatwork to get a token as a response. And that allows us to send
API requests on behalf of the user, but we still have some questions to fill in
from here. How do we renew a token? How do we get a token on login? And how do we
structure our app to recognize the token exists to act accordingly?